If you’re ordering flyers, postcards, brochures, business cards, booklets, or presentation materials, you may hear your printer ask about bleed, trim, and safety margins. These terms can sound technical, but they’re really about one thing: making sure your finished piece looks the way you expect after it’s printed and cut.
Many print problems start before anything goes on press. A logo sits too close to the edge. A background stops short of the cut line. A border looks uneven after trimming. These issues are common, especially when files are created quickly or built in software that wasn’t designed for professional print production.
The good news is that a little planning can prevent most of them. Here’s what small business owners, office managers, and marketing teams should know before sending artwork to a professional printing company.
What bleed, trim, and safety margins mean
Before looking at file setup tips, it helps to understand the basic terms. These three areas work together, but they’re not the same.
Bleed
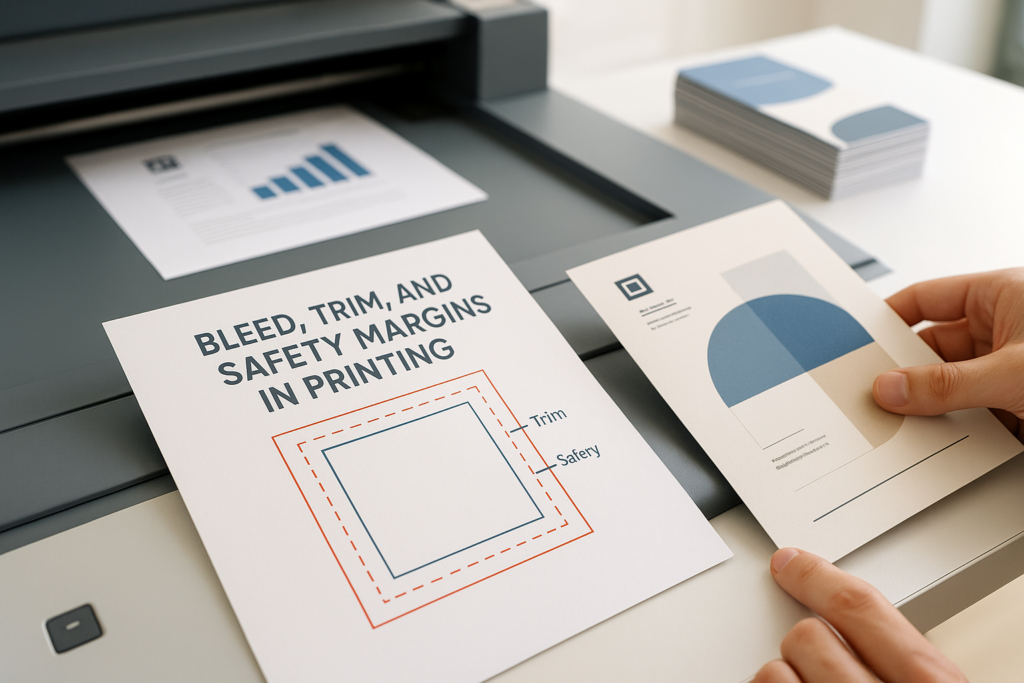
Bleed is the extra artwork that extends beyond the final cut edge of a printed piece. If your design has a photo, color block, pattern, or background that should run all the way to the edge, that artwork needs to extend past the trim line.
Why? Because printed sheets are cut down to their final size after printing. Cutting equipment is accurate, but no physical trimming process is absolutely perfect on every single sheet. Bleed gives the printer a small buffer so you don’t end up with an unwanted white sliver along the edge.
Many print shops commonly request bleed around the outside of the file, often 0.125 inch, but requirements can vary by product, equipment, and finishing method. Always confirm the required bleed size with your print shop before production.
Trim
Trim is the final size of the printed piece after it’s cut. For example, if you order a standard-size postcard, the trim size is the finished postcard size the recipient will hold.
The trim line is not usually meant to print as a visible line. It’s a production reference that shows where the piece will be cut. When artwork is prepared correctly, backgrounds extend past the trim line into the bleed area, while important text and logos stay inside the safety margin.
Safety margins
Safety margins, sometimes called the safe zone, are the area inside the trim line where important content should stay. This includes text, logos, QR codes, phone numbers, addresses, legal copy, and anything else that can’t be cut off.
Safety margins protect your content from small shifts during trimming, folding, binding, or finishing. They also help your design look more balanced. Even if nothing gets cut off, text placed too close to the edge can make a piece feel cramped or unfinished.
Why bleed, trim, and safety margins matter
Bleed, trim, and safety margins matter because professional printing is both digital and physical. Your file may be perfectly aligned on screen, but once ink or toner goes onto paper and that paper is cut, folded, scored, or bound, small variations can affect the final appearance.
These setup areas help account for real production conditions. They reduce the risk of white edges, uneven borders, cut-off text, and awkward placement. They also make your file easier for the print team to review and produce efficiently.
For businesses, this matters because print projects are often tied to deadlines. A trade show flyer, sales packet, direct mail postcard, training booklet, or event program usually has a specific date attached to it. If a file needs to be corrected and resubmitted, that can affect the production schedule.
Clean file setup doesn’t just improve quality. It can also help avoid back-and-forth questions when you’re trying to get a quote approved, meet an event deadline, or coordinate materials across departments.
Common file setup mistakes to avoid
Even experienced teams run into print file issues. Here are some of the most common problems related to bleed, trim, and safety margins.
- No bleed on edge-to-edge artwork: The design stops at the final size instead of extending beyond it, which can lead to thin white edges after trimming.
- Text too close to the edge: Contact information, disclaimers, or headlines sit near the trim line and risk being cut or looking crowded.
- Borders placed near the trim: Thin borders can look uneven if there is even slight trim movement. If you want a border, ask your printer how much margin is recommended.
- Incorrect document size: The file is built at a different size than the requested finished piece, which can cause scaling or layout problems.
- Crop marks placed incorrectly: Crop marks are helpful when used properly, but they should not interfere with the artwork or appear inside the live design area.
- Important content in fold or binding areas: Brochures, booklets, pocket folders, and folded mailers need extra planning so content doesn’t land where it will be folded, stitched, drilled, or bound.
These mistakes are fixable, but catching them early is better than discovering them after a proof or during production.
Print file setup tips for cleaner results
If you’re preparing artwork for professional printing, start by asking your print shop for the correct specifications. File requirements may vary depending on the product, size, paper, press, and finishing options.
Use these practical tips as a starting point:
- Build the file at the final trim size: Set up your document based on the finished size of the piece, then add bleed according to the printer’s instructions.
- Extend backgrounds into the bleed area: Any image, color, or pattern that should reach the edge should go beyond the trim line.
- Keep key content inside the safe zone: Move text, logos, QR codes, and critical details away from the cut edge.
- Be careful with borders: If your design uses a frame or border, leave enough space so minor trimming variation isn’t noticeable.
- Export the right file type: Many printers prefer print-ready PDFs, but you should confirm preferred file type, color settings, fonts, and image requirements with your provider.
- Review a proof closely: Check spelling, phone numbers, URLs, QR codes, page order, folds, and content placement before approving production.
If your team uses design software like Adobe InDesign, Illustrator, or Canva, look for document setup options related to bleed and margins. If you’re working in Microsoft Word, PowerPoint, or another office program, extra care may be needed because those tools are not always ideal for edge-to-edge commercial print layouts.
How paper and finishing can affect safety margins
Bleed and safety margins are not only about cutting. Paper choice and finishing can also affect how your design should be prepared.
Thicker paper may behave differently during folding or scoring. Booklets may need attention near the spine, especially when there are multiple pages. Presentation folders, drilled documents, spiral-bound books, and stapled materials may require extra room where the finishing happens.
Direct mail pieces can also have postal layout considerations. If a postcard or self-mailer needs an address area, indicia, barcode clear space, or tabbing, those requirements should be part of the design conversation before artwork is finalized.
This is why it’s helpful to involve your print shop early, especially for folded brochures, multi-page pieces, packaging, mailers, or anything with special finishing. The right margin for a flat flyer may not be the right margin for a folded or bound piece.
Timeline expectations when files need adjustment
File issues can affect timing. If your artwork is missing bleed, has low-resolution images, includes text too close to the trim, or is built at the wrong size, the printer may need to pause and ask for a revised file.
That review step is valuable because it helps prevent avoidable print problems. Still, it can add time, especially if multiple people need to approve changes. If your project has a firm deadline, send files as early as possible and mention the deadline when requesting a quote.
It’s also smart to ask whether your project will include a digital proof, hard copy proof, or production proof. Proofing options vary by project and provider, but reviewing a proof is one of the best ways to catch layout issues before the full run is produced.
When to ask your print shop for help
You don’t need to become a prepress expert to order professional printing. If you’re not sure whether your file has the correct bleed, trim, and safety margins, ask before placing the final order.
A print team can often review your file and tell you whether it’s ready for production or needs changes. They can also confirm the correct size, bleed, safe zone, folding panel layout, binding allowance, and finishing considerations for your specific project.
Ask for help early if you’re working on:
- Business cards with full-bleed backgrounds
- Postcards or direct mail pieces
- Brochures with folds or panels
- Booklets, catalogs, or manuals
- Presentation folders or die-cut pieces
- Signs, banners, or large-format graphics
- Event programs with tight deadlines
The earlier you ask, the easier it is to make adjustments without slowing down the job.
FAQ: bleed, trim, and safety margins
Do I always need bleed?
You usually need bleed when artwork is intended to print to the edge of the finished piece. If your design has a white background and nothing reaches the edge, bleed may be less critical, but you should still confirm file requirements with your print shop.
Can the printer add bleed for me?
Sometimes, but not always. If the background is a solid color or simple image, adjustment may be possible. If important design elements are already too close to the edge, adding bleed may require design changes. Ask your printer to review the file before assuming it can be fixed.
How far should text be from the trim edge?
Safe margin recommendations vary by product and finishing method. As a general rule, important text and logos should not sit right against the trim line. Your print shop can provide the recommended safe zone for your specific piece.
What happens if my file doesn’t have proper margins?
The final piece may have white edges, uneven borders, crowded text, or content that is cut too close. In many cases, the printer will flag the issue before production, but that can delay the project while a corrected file is prepared.
Get help with bleed, trim, and safety margins before you print
Understanding bleed, trim, and safety margins can save time, reduce file problems, and help your printed materials look polished. These details may be small, but they make a real difference once your project is printed, cut, folded, or finished.
If you’re preparing a print order and aren’t sure whether your file is set up correctly, send it to our team for review. We can confirm the specs for your project, answer file setup questions, and provide a quote based on the size, quantity, paper, finishing, and deadline you need.